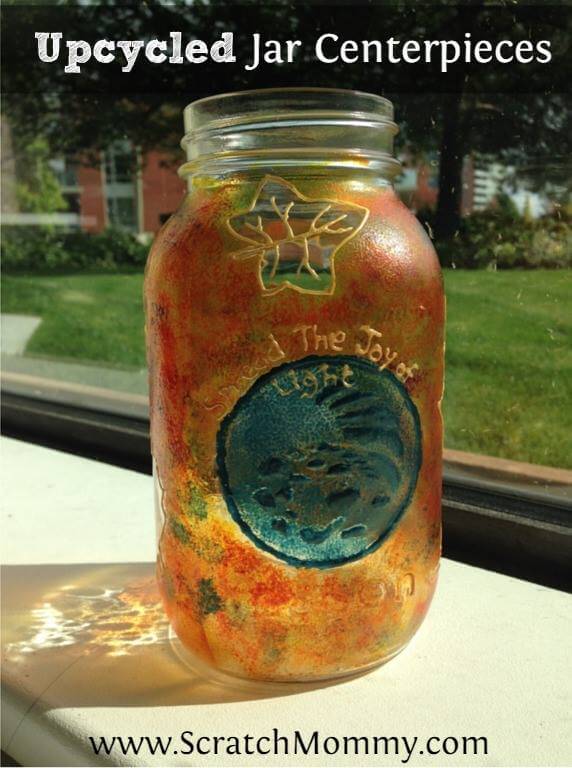
Upcycled Jar Centerpiece
Last updated on March 12, 2026 by Crystal Allen
Originally published on October 5, 2014
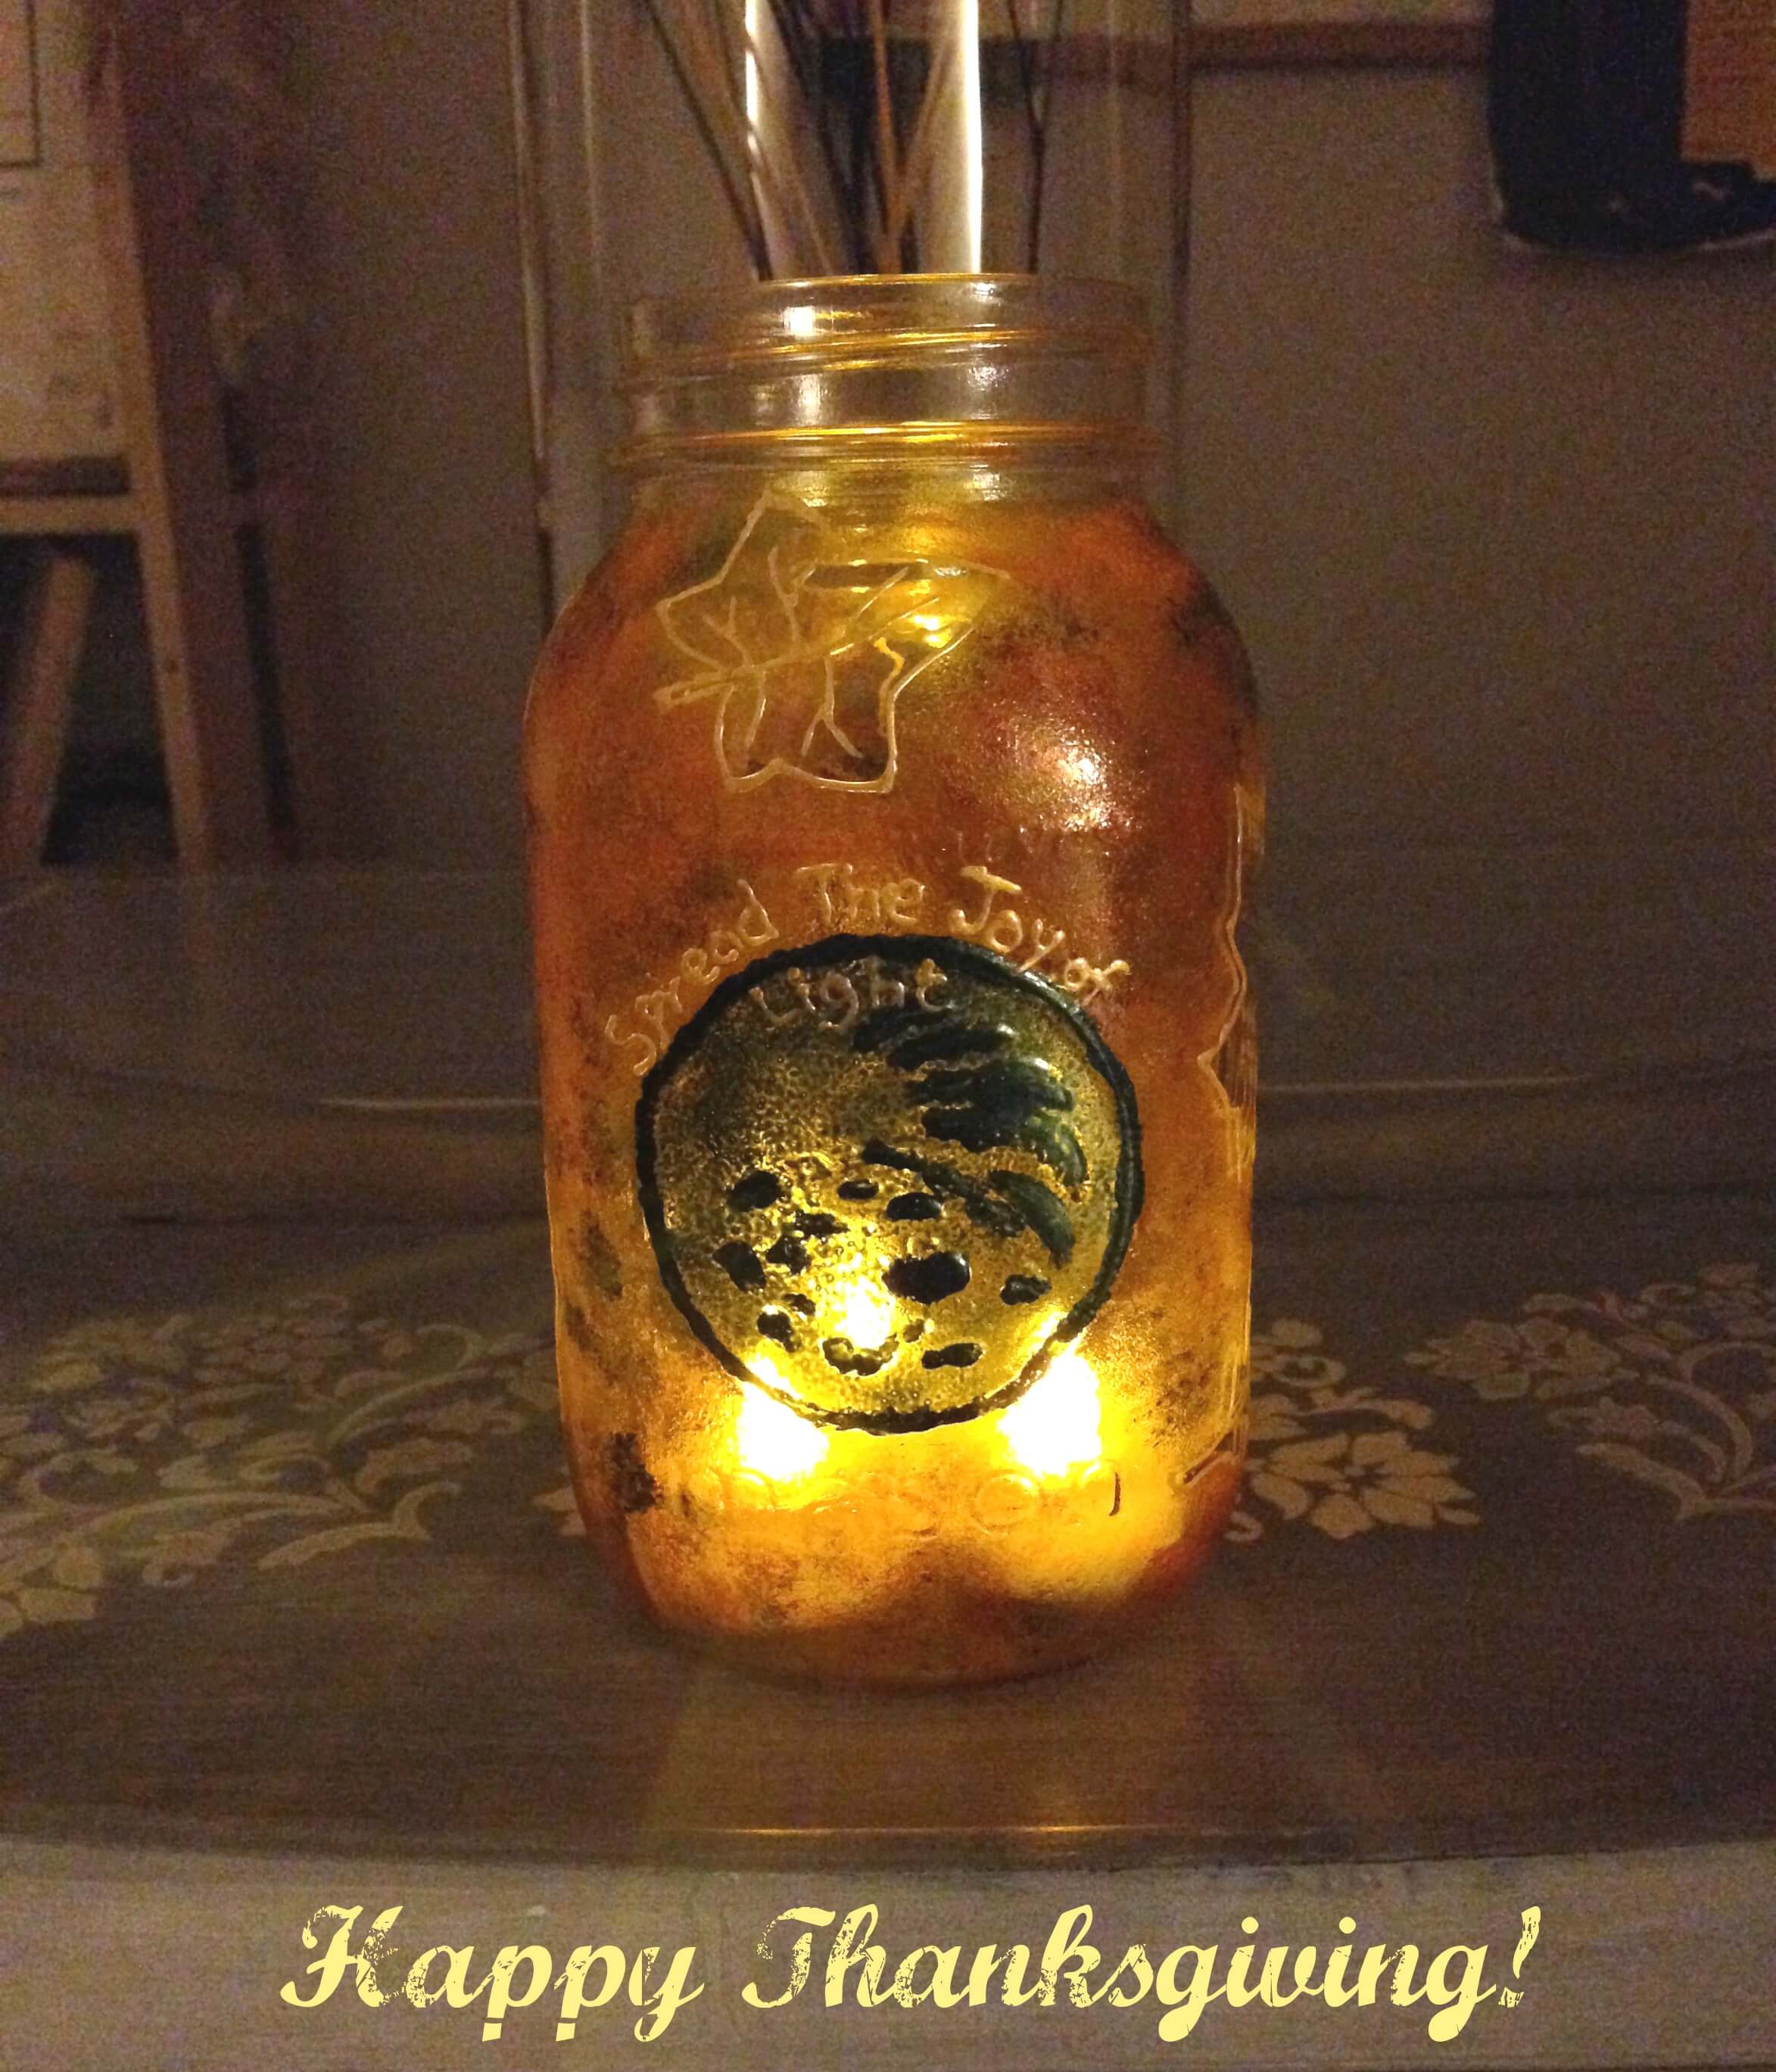
I am so excited for the upcoming holiday. It’s Thanksgiving! There are so many things to be thankful and grateful for not just on Thanksgiving but everyday. To make our first Thanksgiving with our son, Ryan in our new home special, I wanted to create something that will mark the event. When I found out that my friend Reena of Seasonal Leaf Designs is a glass painter, I knew I had to make one!
This project is very simple and leaves lots of room for creativity. Create your personal style by choosing colors you love and designs that fit your style. This is the perfect project for any season or holiday, would make a fabulous centerpiece and a great personalized gift. Decorate with white, blue or silver snowflakes and battery powered candlelights for a beautiful Christmas decoration.
Upcycled Jar Centerpieces
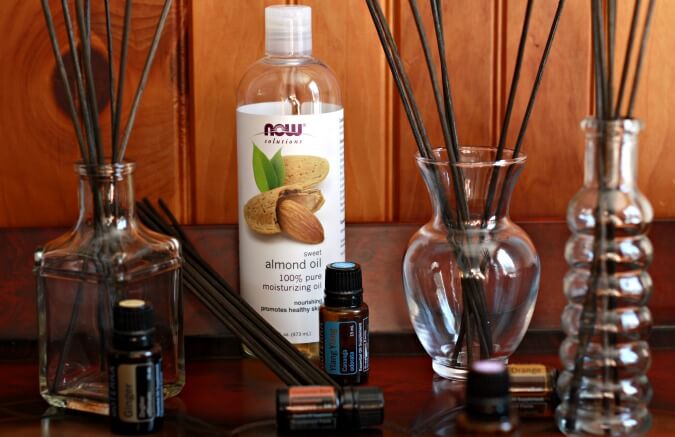
What you’ll need:
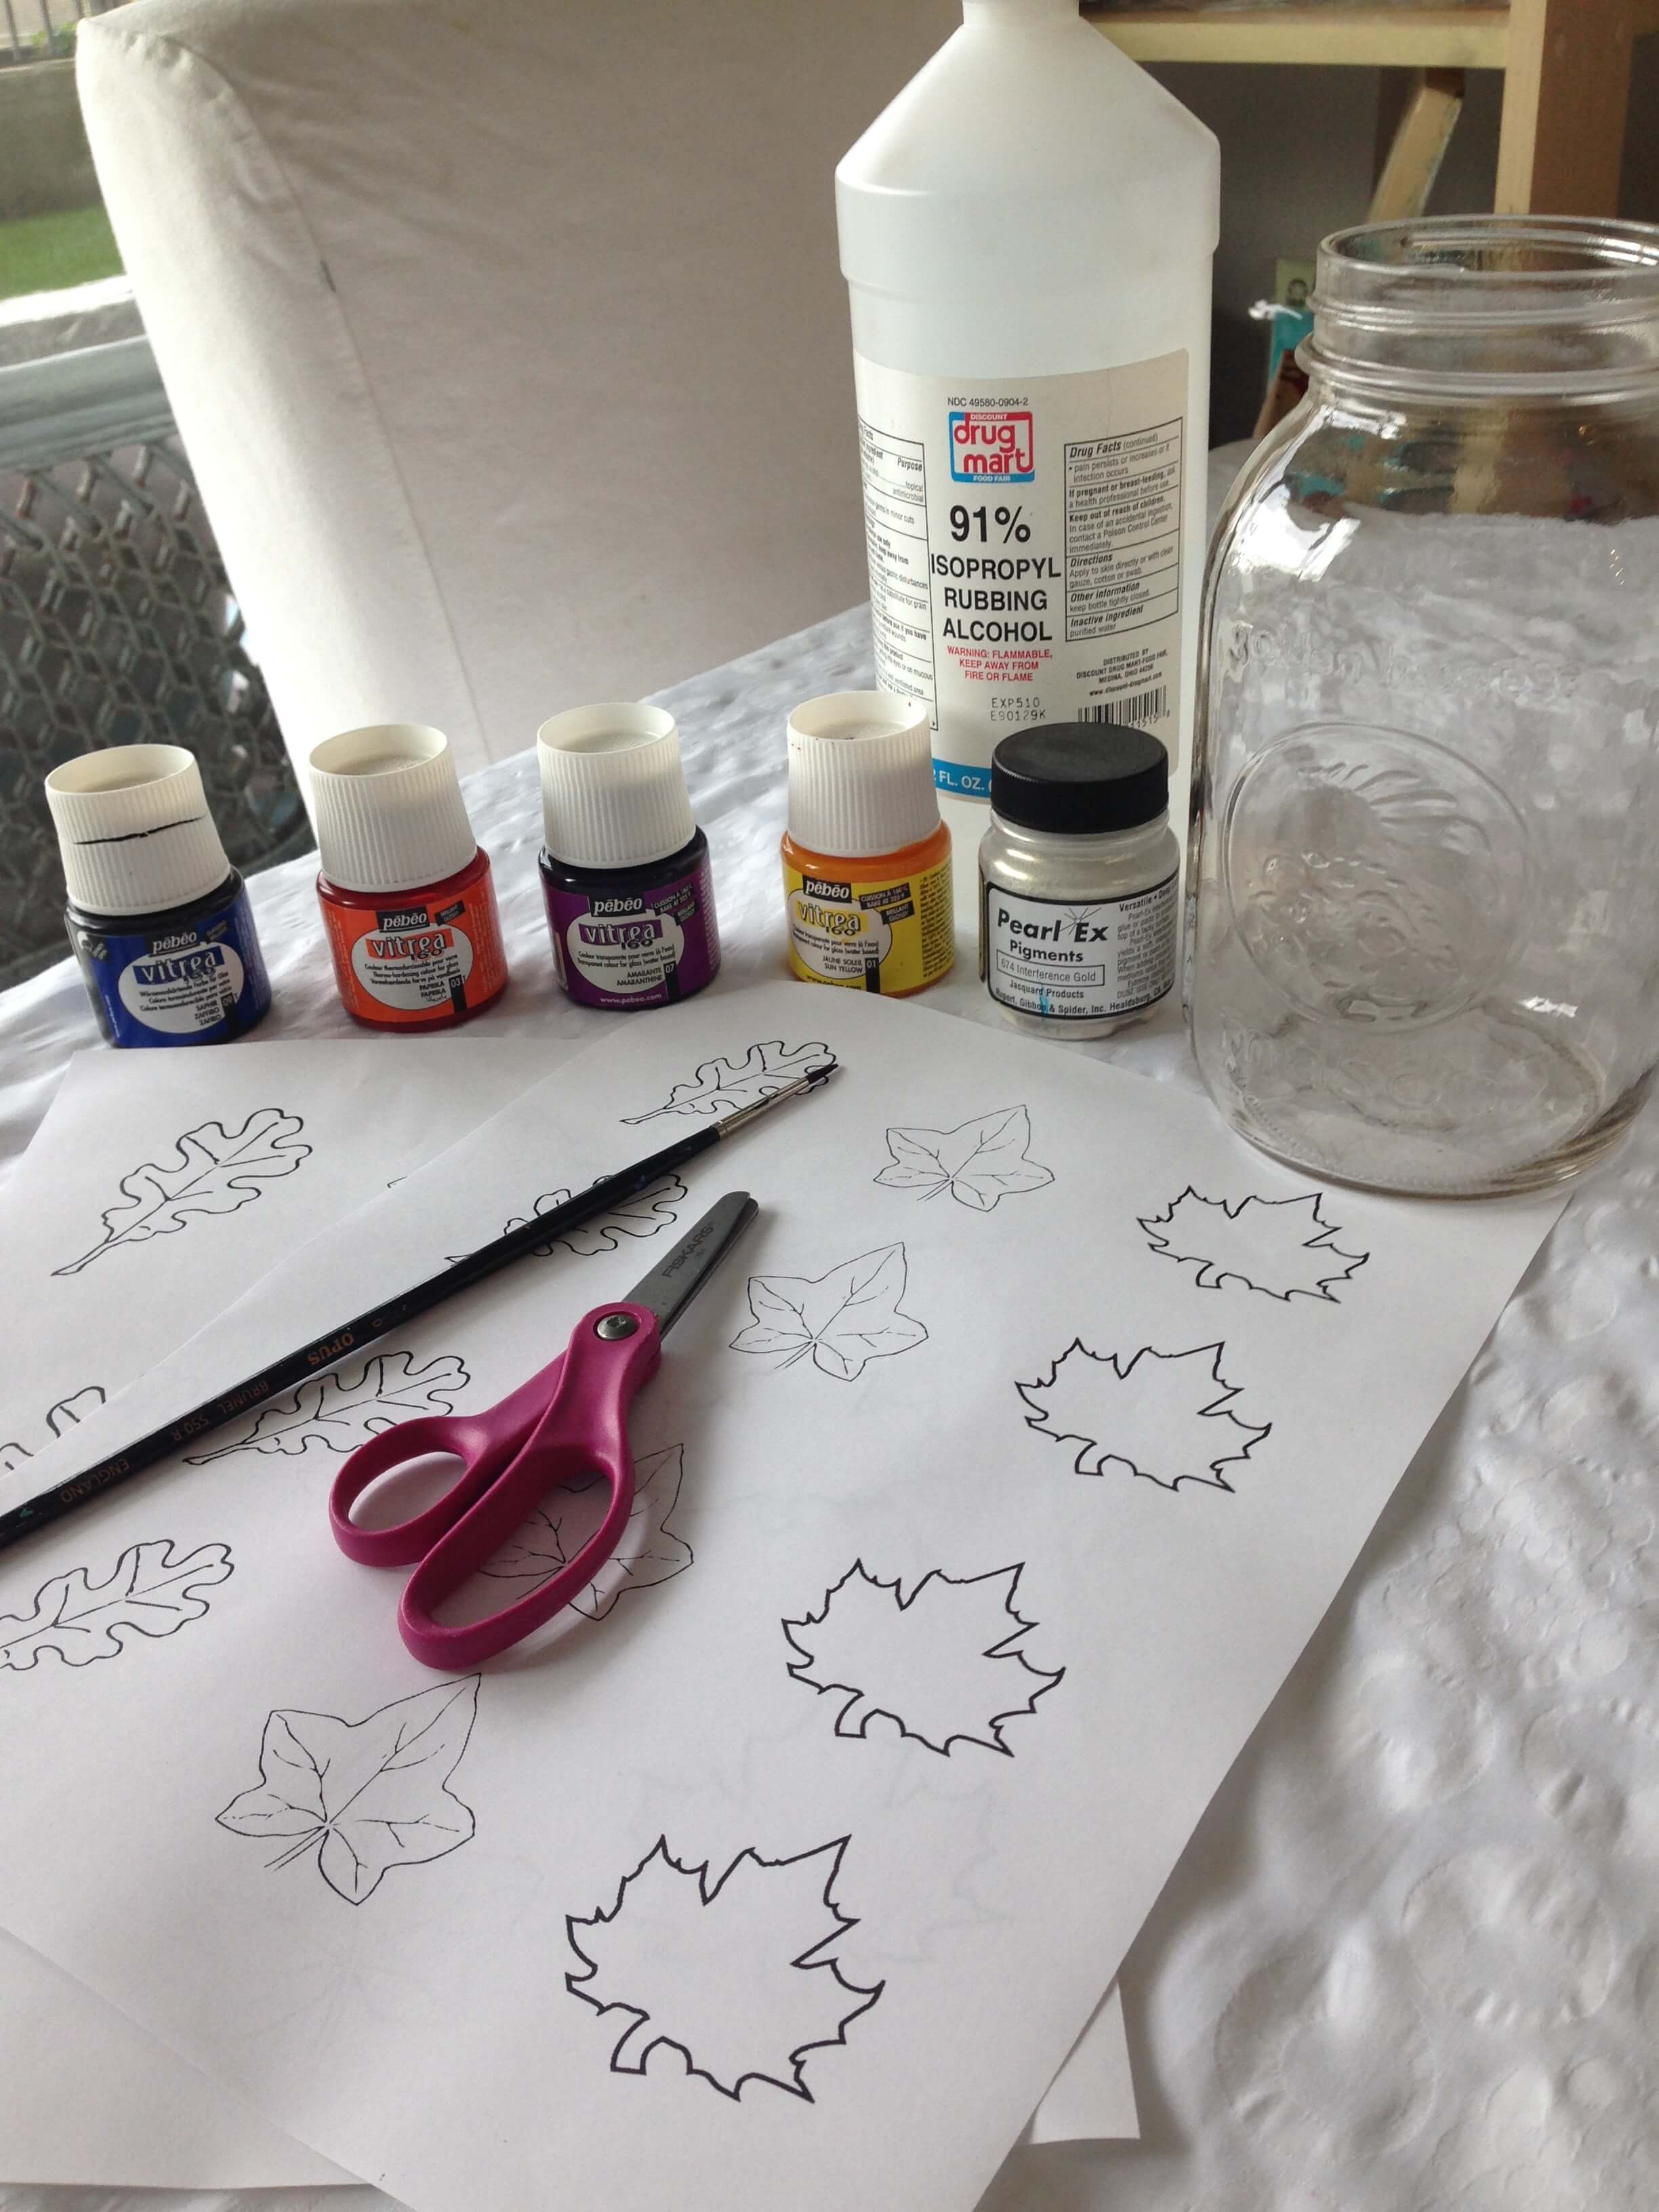
- Glass Paints. We used Pebeo Vitrea 160. The transparency of this paint when applied on glass allows you to take full advantage of the light.
- Pearl Ex Pigments for a metallic effect (optional)
- Outline Paint to highlight your design (optional). We used Pebeo Vitrea 160 Transparent Outliner.
- A mason jar or any glass container
- Isopropyl Alcohol, to clean the jar and remove fingerprints or marks
- Sponge, cut in smaller sizes. Rather than a paint brush, this will create the stippling effect as you dub the paint onto the glass
- Stencil brush (optional, also creates a stippling effect)
- Cut out patterns to be used for reverse stencilling
Let’s Do it!
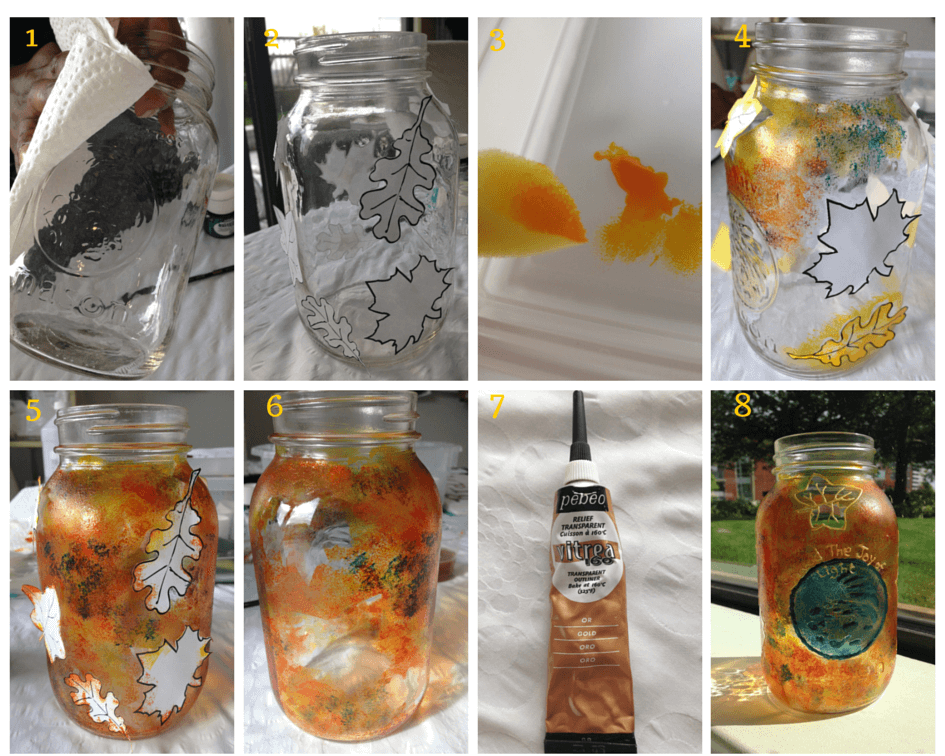
1. With a paper towel, clean the jar with Isopropyl Alcohol to remove fingerprints and marks. Keep in mind to not touch the outside of the jar while doing this project. You do not want marks on it to stay permanently.
2. Cut your patterns or designs to be used as stencils and tape it onto your jar.
3. Using a sponge or a stencil brush, dab very little paint onto your sponge.
4. Begin painting by dabbing onto your jar and around your patterns.
5. Keep in mind to just dab the paint and not to do strokes. Dabbing creates the stippled effect. One layer of paint at a time and add as many colours you like. Feel free to use any painting technique! It’s your project, so make it You!
6. Carefully remove the patterns
7. With the liner or a paint brush, outline your patterns just like we did on the leaves
8. Let the paint dry for 24 hours. Pre-heat oven and bake at 160C or 325F for 40 minutes. Let the jar sit and cool inside the oven. This will ensure the paint will be permanent.
*** Hand wash only. Do not put in the dishwasher.
Voila!
And there you have it, a beautiful, hand painted piece for your home. Be it on your dining table for Thanksgiving dinner or on your entry way, this simple and easy project will surely bring in color and light to any space.