Knowing how to DIY your own skincare (and other) products is one of the best things that you can learn how to do. Not only will you save money over the long run, you will have complete control over the quality of ingredients that you use and ultimately put onto your kids, your family’s, and your own body. I absolutely love to DIY! I may not always have the time for it, but I love it nonetheless.
There is something magical about taking raw, natural, and organic ingredients that start out as individual components, and then making them become something completely different – something more powerful and useful than they were before.
I always feel so empowered when I DIY. I love knowing that I can create something specific to a need that I have, that it will work and that it will contain no potentially harmful or toxic ingredients. I also do quite a bit of my DIY creating either with, or around, my children (they are almost 6 years old now, and my daughter is especially interested in everything I create and use for our family). So for me, the process of creating quality skincare products from scratch helps to provide an opportunity to educate my kids while bonding with them.
For example: they are learning how to read, but can now identify quite a few essential oils by sight, and know the different things we use for different purposes (like, lavender essential oil with fresh aloe for a sunburn, our herbal infused balms and salves, or my homemade whipped shea butter & coconut oil for our skin after bathing). Creating gives us the chance to learn together, to discuss the benefits of why we are making things from scratch, and those are some of my favorite things.
But what about proper DIY skincare etiquette?
What are the guidelines…the do’s and don’ts…that you should follow? I know that at the very beginning I struggled with this and wish I had had an all-encompassing guide to follow, and I sure didn’t. So I have created one here for you!
I have compiled the most important points to understand and follow when creating homemade, all-natural, preservative-free skin, and body care items.
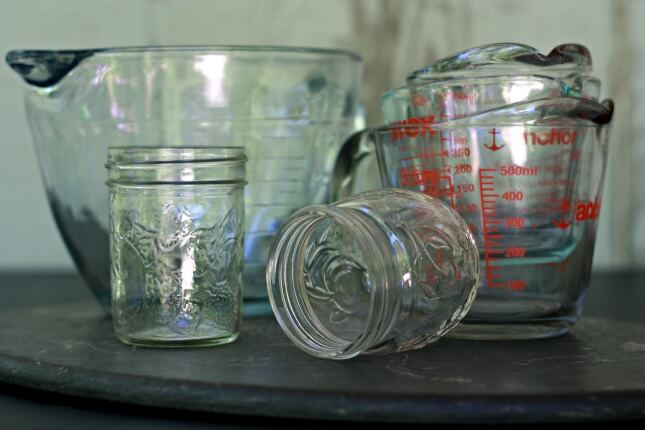
Sanitize your mixing bowls, measuring cups, etc.
I think the most important thing to start off with for this post is to advise you to use pots, pans and instruments that are designated strictly for DIY use, and not shared with food making.
Make sure your hands are freshly washed and dried, and clean your work area (vinegar works well for this purpose).
If you are reusing jars, etc. you will want to wash them with HOT soapy hot water to remove any old product or residue.
Boil your heat safe items in a large pot of water, making sure they are submerged, for at least 10 minutes. Use tongs and caution to remove them since they will be really hot!
The next step is vitally important – make sure everything is completely dry before using it!!! If you are not using them immediately you can place them on drying racks to fully dry before using. If you need to use them quickly, make sure your oven is preheated to a low 280 F degree temperature, and place everything in the oven for 5 – 10 minutes to fully dry. Let them cool and they are ready for use!
For utensils, you can use a non-toxic cleaner like Branch Basics. Note: I have seen many online recommendations to submerge your items into a bleach and water mixture, but I do not personally recommend using bleach on items that you are then going to be using to make and store your from scratch, organic, and homemade creations (I won’t even use bleach on my clothes).
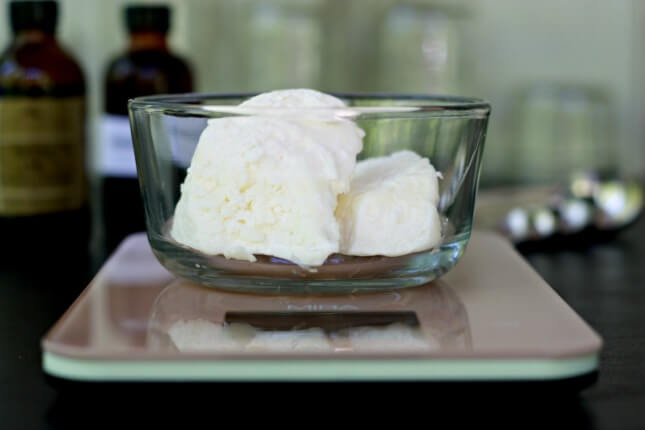
Weigh your ingredients as opposed to measuring them for better accuracy
I am going to go ahead and say that this is probably one of the most asked questions by DIYers:
Why should I weigh my ingredients instead of measuring them by volume?
…or a question asking about converting from weight to volume. For almost all DIY recipes, weight is more accurate than measuring…it may only be slight (or in some cases there may be a really big difference!), but it IS more accurate.
To break it down simply: oils, and other DIY ingredients, can have different densities. So a cup of one oil by volume may actually weigh more than a cup of another type of oil, and so on. One of the best kitchen investments you can make is in a good digital scale. (see why Scratch Mommy LOVES this scale!)
Use glass mixing bowls as opposed to metal or plastic
Glass is always going to be your best choice in making DIY creations, due to it being an impervious material. It’s not going to absorb smells, it’s easy to clean, and since so many DIY recipes potentially use essential oils, you don’t have to worry about the glass damaging the oils or vice versa (some metals can react with and leach into the oils).
If you are using metal, use a high grade stainless steel. And for utensils, use either stainless steel, or nylon or silicone spatulas as opposed to rubber.
Wooden bowls and utensils can absorb scents and other things that can be transferred into parts of the recipe where they should not be…plus they can be notoriously difficult to clean thoroughly. And as for plastic: most of us are no longer using this in our daily lives due to the chemical components, so I won’t even go into detail on this one.
No water in products due to possible bacterial growth
This includes using clean and dry hands for anything that requires hand application!
This one is HUGE!
Water is the giver of life and something that every living thing needs. And that goes for bacteria too. Make sure your bowls, utensils, and jars, etc. are fully dry before using them. When you take your bowl off of heat, don’t hold it over your containers so condensation won’t drip in. Wipe your bowl down before pouring ingredients out.
You are creating organic, preservative-free products, and in most DIY recipes water (aka: potential bacterial growth) is not your friend! Note: there are recipes that require water as a main ingredient, such as bug spray or liquid hand soap, which has it’s own guidelines and brings me to our next point below…

Use distilled water for those recipes that require water
(liquid hand soap, body, or room spray, etc.)
When you are making a DIY recipe that calls for water, do not use tap water. Most tap water contains bacteria and minerals that you do not want in your creations.
In short, distilled water is pure water that results from water being steamed and recaptured, leaving the contaminants behind. Another good choice would be filtered water that come from a high quality filtering system (think Berkey instead of Brita).
Last but not least, if all else fails, boiled water that has been cooled is okay, too.
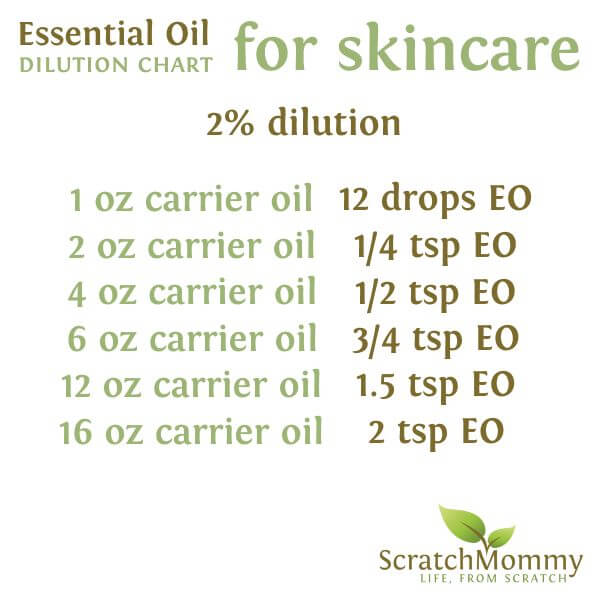
Understanding of essential oil ratios
Essential oils are extremely strong and undiluted when you purchase them. You will need to use a carrier oil, or be making them into a finished product (think: body scrub, toner, deodorant, or anything else similar. You will want your essential oils to be at a 1% or 2% dilution rate. There is a great written explanation of this at Mountain Rose Herbs, and we at Scratch Mommy have also created an easy to read, visual graphic to guide you.
Understand the shelf life of your products and what impacts it
For example: If you are making a skincare product with real food in it – make a single batch, no more than you can use at a single time.
Never put dirty fingers or hands into your handcrafted, preservative-free product as this can contribute to bacterial growth (use a small spoon instead).
Don’t introduce water into your products after they are created, and make sure to put the lids back on right after getting what you need out of the jar. Store your creations in a cool, dry area, or in the refrigerator if need be, which brings me to my next point…
Refrigerate when necessary
Not only will this help to keep contaminants at bay, it will help extend the shelf life of your natural product. And although sometimes the consistency of your product may change in the fridge, it will go back to “normal” at room temp.
Utilize Vitamin E to extend shelf life (if applicable)
There is lots of conflicting info on this, but if you feel it will help with stability, it certainly won’t hurt it :). Many people will call vitamin E a natural preservative, which it actually is not; but it IS an effective and healthy way to decrease oxidation of DIY skincare products.
Start Small
Whenever you are making a new recipe or are maybe unsure if you will actually like what you are making, start small. Lots of DIY recipes are for larger quantities. But you don’t want to waste precious materials and ingredients. So, halve the recipe, make sure it works and that you like it, and go bigger next time.
Understanding Substitutions
This is something that we all do. We don’t have one ingredient but we do have something that we think will work in it’s place.
For the most part, this is fine BUT you do need to have some experience and knowledge when you are doing this in recipes.
Unless you are extremely knowledgeable about this, when following a recipe it’s best to stick to that recipe, read the blog comments in the post to get advice (even reach out to the author if you need to, most are very willing to help you figure things out), and know that some things can be easily swapped (like carrier oils) but to always be wise in the end.
Is there anything else that you would add to this post as must-know information? If so, please let us know in the comments!
Enjoy your DIY time and creations!
If you’re feeling overwhelmed and not ready to dive in to DIY, you can always pop into our Organic Skincare Shop to pick up some of the finished products mentioned in this post!
Comments 13
Thank you, Amanda, for sharing such cohesive guidelines. I honestly had not thought about a number of them. May I ask how you manage all of the ingredients you keep on hand? Do you have purchase, storage, and rotation recommendations? Cheers, Ardith
Author
Hi Ardith. You are very welcome. It makes me happy to hear this was helpful to you. As for handling ingredients on hand…right now I don’t actually keep a lot. I live in a very small house with virtually no storage space. I really just keep my “must-have” basics on hand: a variety of carrier oils and butters, herbs I use a lot of (rosemary, plantain) and storage containers. I try to reorder beforehand if I plan on making certain things.
~ Amanda
Great post! I recently started making body scrubs and selling online and at local vendor booths. I wish I could have found this information all in one post when I started out. I scoured the internet everywhere before I found all the information I needed to get started. And, I love that you are local to me!
Author
Hi Amy, I am so glad that this post has been a huge help to you! And I feel the SAME way…I wish this information had been all in one place for me when I needed it. I hope you will bookmark this post to reference when needed, and please share it with others who may need to read it 🙂
~ Amanda
Hi Amanda,
I learned so much from this post. I did not realize that you needed to be so careful with preparation and usage, but it makes sense. The dilution chart was very helpful as well. After reading this, I feel like I could try a small project. thanks!
Author
I love that you feel ready to try a DIY project after reading this Carol. That is the very reason why I write things like this.
~ Amanda
Thank you so much for this post, Amanda. You’re a life saver. I’m just now getting back into DIY and am forever calling my mother with questions about sanitizing containers, avoiding water, etc. Now I can give her a break and just bookmark this post! Cheers!
Author
Cory, you are so very welcome. Putting this post together has been proving to be a lifesaver to even myself. It is so nice to have the info I need right at my fingertips. I am glad you will use this!
~ Amanda
What a great post, Amanda! These tips are SO important to remember and I will definitely be sharing.
Author
Thank you Nadia!
Great post! I’m having issues cleaning out deodorant containers. The recipe I use has a combination of beeswax, shea butter and coconut oil (among other things). I feel that these 3 ingredients leave a film that is very difficult to get off. I’ve asked around have haven’t gotten many answers on how other clean them out. I’ve done the hot soapy water and used a toothbrush to help get down in the tube. Those ingredients are not water soluble. Would you have any other suggestions for me? Thanks!
Author
Hi Jennifer. Sometimes I find that allowing a container to fully dry out, and then scraping the leftover material(s) off instead of using water and soap tends to work. I hope that may be helpful to you. I must say myself that the most bothersome part of DIYing is the cleaning…it is not always easy.
~ Amanda
Hi there – I have the same problem with homemade deodorant in containers. I have found that baking soda does a great job cleaning out the residue. Just dump some in the container, add hot water and some liquid soap, and scrub. Voila!