Cheesy Quinoa Crackers Recipe
Last updated on December 20, 2024 by Jessica Healey
Originally published on February 7, 2013
Why Quinoa Flour?
Quinoa flour is a game-changer when it comes to homemade snacks. Quinoa itself is often referred to as a “superfood” because it’s a complete protein—meaning it contains all nine essential amino acids. That’s pretty rare for plant-based foods! Using quinoa flour in recipes like this is a fantastic way to add more nutrition to everyday snacks without sacrificing flavor or texture.
Plus, if you’re gluten-sensitive or looking to reduce processed grains, quinoa flour is naturally gluten-free. Just be sure to get a high-quality version or make your own by grinding quinoa in a high-powered blender (your Vitamix works wonders for this).
How to Make Cheesy Quinoa Crackers
(See full recipe below!)
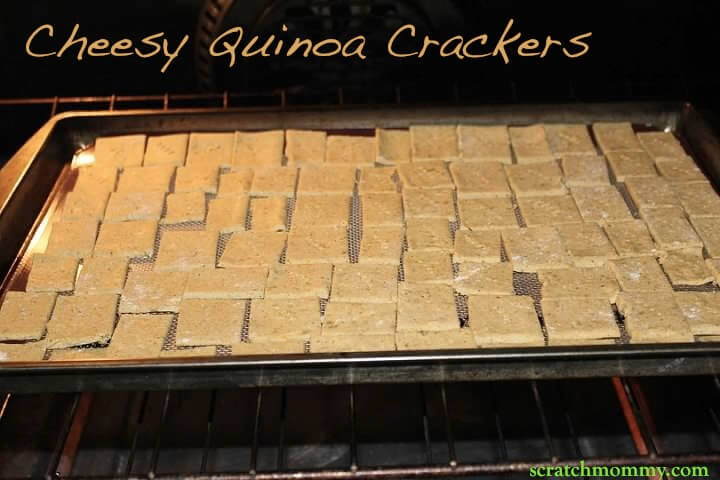
The process is simple, but the results are impressive. The key to achieving that perfect crunch is rolling the dough thin—thinner than a saltine cracker—and keeping an eye on the bake time. It’s okay if some crackers bake faster than others. I always remove the golden, crispy edges first and let the center crackers keep going until they’re done.
A pizza cutter makes slicing the dough into uniform squares super easy, and poking a few holes in each cracker with a fork gives them that charming, rustic look.
Homemade Crunch > Store-Bought
These Cheesy Quinoa Crackers Recipe is proof that real food can be fun, satisfying, and simple to make. There’s no need to rely on processed snacks when you can create something this delicious right at home.
And let’s face it—there’s something incredibly rewarding about baking from scratch. You know exactly what’s going into your food: no preservatives, no weird additives, and no hidden ingredients. Just wholesome, crunchy goodness.
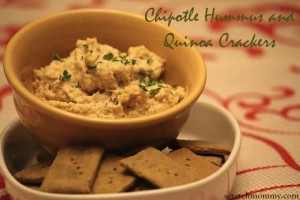
So, whether you’re pairing them with a creamy dip (maybe our Instant Pot Chicken Fajitas), sprinkling them over soups, or just snacking straight from the container (guilty!), these crackers will satisfy your crunch cravings in the best way possible.

Cheesy Quinoa Crackers Recipe
Ingredients
- 1 1/2 C quinoa flour plus a little extra for rolling your flour out
- 1/4 C coconut oil
- 3/4 C water a little on reserve to get the right consistency
- 1 t baking soda
- 1/2 t sea salt
- 1/4 t garlic powder
- 1/8 t onion powder
- 1/4 t parsley flakes
- 1/4 C cheese I like to use Kerrygold Blarney Castle n this recipe, but you can use whatever cheese you like
Instructions
- Preparation: Preheat the oven to 350°F (175°C). Lightly flour the surface where you'll roll out the dough.
- Mixing: In a stand mixer, combine all ingredients on low speed until a sticky dough forms. If the mixture is too dry and doesn't come together, add water incrementally (a teaspoon at a time) until the desired consistency is achieved.
- Rolling: Transfer the dough to the floured surface. Dust a rolling pin with flour and roll the dough from the center outward, aiming for a thin sheet—thinner than a standard saltine cracker for optimal crispness. If the edges become too thin, trim and reposition them onto the dough's center, then re-roll.
- Cutting: Using a pizza cutter, slice the rolled dough into small squares. For a decorative touch, use a fork to poke four holes in the center of each cracker.
- Baking: Place the cracker squares onto a baking sheet lined with parchment paper or a baking mat. Bake on the middle oven rack for approximately 20 minutes, checking periodically. If the outer crackers brown faster than the center ones, remove them and continue baking the rest until all are done.
- Cooling: Allow the crackers to cool for at least 30 minutes to ensure they set properly and achieve the desired crunch.
Give Cheesy Quinoa Crackers a Try!
If baking feels intimidating, trust me—these Cheesy Quinoa Crackers are a great place to start. They’re easy to whip up, pretty forgiving, and totally worth the effort. Plus, when you taste that first crispy bite, you’ll feel like a kitchen rockstar.
Let me know how they turn out for you! I’d love to hear if you try any fun flavor variations (a little paprika or rosemary, anyone?).
Until next time…
xoxo,
Jess aka, Scratch Mommy
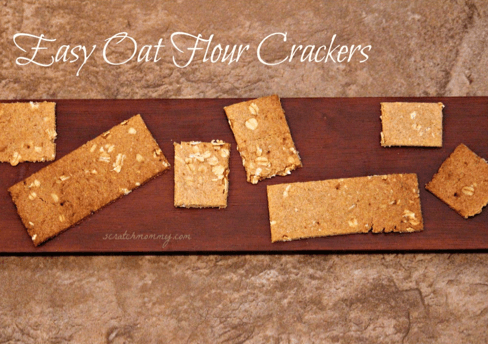
Looking for more cracker recipes? You gotta check out our EASY Oat Flour Crackers!
This post was shared at– Thank Your Body Thursday and Whole Foods Wednesday.


These look so good! I wonder if they would work without (the best part) cheese?! We’ve got dairy allergies here and wonder what I could substitute. Any thoughts? Much appreciated!
Guess who’s inspired to make crackers? THIS GIRL! 🙂 YUM Thanks for linking up at our Gluten Free Fridays party! I have tweeted and pinned your entry to our Gluten Free Fridays board on Pinterest! 🙂
Be sure to stop by to see who the winner of our So Lucky GF Basket is! We are ALSO having a fantastic giveaway this week to kick off Celiac Awareness month! 🙂
Cindy from vegetarianmamma.com
Usually when recipes go wrong I dont even bother to reply or comment. But not anymore.
Dude, I followed this recipe to the letter and it came out awful. WAY too oily of a mix. What you called for left a super gross oil ball that still kept crumbling apart. For anyone who is planning on using this beware.
Hi Christine. I’m sorry the recipe didn’t turn out well for you. I have made this recipe countless times and never had an issue. Did you change any of the ingredients (alter, add, remove, different brands)? Sorry it didn’t work for you…you must have done something a bit differently than me, but I’m just not sure what.