3 Ingredient DIY Rosemary Cedarwood Facial Toner
Last updated on March 12, 2026 by Jessica Healey
Originally published on February 25, 2015

Every day I put my best face forward. And I can finally say I have reached a confidence level with my skin so that I really believe that it is my best face. It hasn’t always been like this though.
My skin was definitely at it’s absolute worst when I was using commercial skin-“care” products. I cringe now when I look back at the amount of money and time that I spent putting toxins onto my skin and ultimately into my body — it’s crazy.
I began to see dramatic, continual improvement in my overall skin tone and my occasional acne once I learned how to properly care for my face. When I stopped washing my face with soap, ditched the commercial cleansers and moisturizers, and I started wearing mineral makeup on the occasions that I need to (like this AMAZING DIY facial powder) the game changed.
I ditched soaps and cleansers on my face and switched to using just witch hazel as my facial toner, which I would then follow up with an essential oil (or blend) mixed with a carrier oil that suited my skin. This routine worked very well with and for my skin. But for me, living a DIY #LifeFromScratch means that I am always trying to come up with different ways to combine natural ingredients in a way that will be beneficial to my changing needs.
Enter this homemade facial toner!
So, my initial thought was to simply combine essential oils with the witch hazel. Then my dad gifted me with a small potted rosemary plant. I am pretty sure that I am one of the very few people on this planet who does not like rosemary for cooking. I do enjoy the aroma of rosemary, but have never really liked the taste it imparts to recipes.
So I started to feel bad for this little plant for two reasons:
- What was I going to use it for since I didn’t really care to cook with it?
- I am well known for killing innocent houseplants. I don’t try to, it just happens and I just accept it as part of who I am. I stick to outdoor plants for the best results.
Then I started reading and realizing that it would be a great herb to use in a skincare recipe. And since I was looking to add some additional oomph to my plain old witch hazel facial toner routine I decided to infuse rosemary leaves into the witch hazel and add cedarwood essential oil (which is one of my favorite essential oils for skincare) to the mix to create this 3 ingredient DIY rosemary cedarwood facial toner.
The ingredients in this facial toner combine to create a grounding, woodsy aroma while cleaning and toning the skin.
This natural toner is gentle enough to use daily as it helps prep your skin for moisturizing. Your face will benefit from the pore tightening and overall smoothing effects of this simple DIY toner — I have really been enjoying this creation in my new skincare routine!
My routine has been to remove my mascara with either coconut or sweet almond oil (learn more about carrier oils here). Next, I wash my entire face with hot water to open my pores. I then apply the toner with cotton balls, using small circular motions all over my face to remove any excess makeup, dirt, and oil. Then I apply my moisturizer which usually is just a carrier oil (or blend of carrier oils), sometimes with a couple drops of ylang ylang and lavender essential oils. My skin feels clean, smooth, and nourished.
More on ingredients in DIY Rosemary Cedarwood Facial Toner:
Witch Hazel – Made from the bark of the witch hazel plant, it is a wonderful light astringent and helps to tone and tighten the skin. It is beneficial for acne prone and oily skin due to it’s mild antibacterial properties (1). And regular, healthy skin will enjoy the rejuvenation and refreshing qualities. Witch hazel is the base for a perfect skin toner, and can also be used in place of a cleanser. Because it is so mild, it can be used alone, or you can combine or infuse it (like we are doing here today) with various herbs.
* Learn to make your own homemade DIY witch hazel here!
Rosemary Leaf – Probably one of the most well known and used herbs, rosemary is not only distinctive and delicious in cooking but when used on the skin it’s antioxidant properties promote healthy circulation while the scent of rosemary enhances mental alertness (2).
Cedarwood Essential Oil – Steam distilled from cedarwood, this essential oil has regenerative and astringent properties to help promote clear, healthy skin (3). It’s woody, dry aroma is wonderfully grounding in skincare recipes. It blends well with rosemary, which made it the perfect addition to this facial toner.
Want other natural DIY face recipes, like serums? Here you go!

3 Ingredient DIY Rosemary Cedarwood Facial Toner
Ingredients
- 1/4 Cup rosemary dried rosemary leaves
- 3/4 Cup witch hazel
- 30 Drops cedarwood essential oil optional 10 more drops for stronger aroma
Instructions
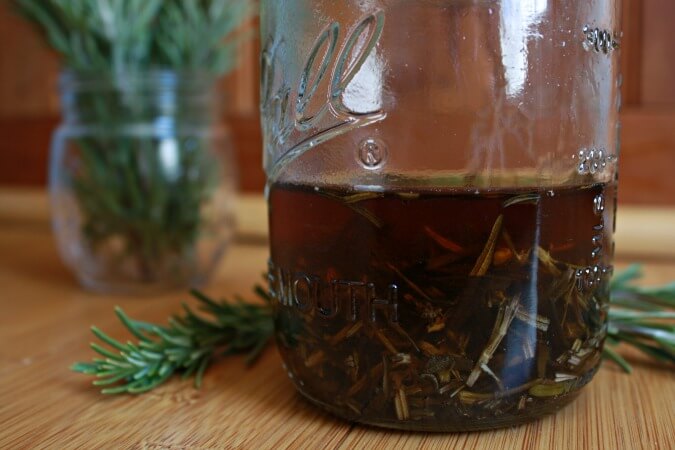
- Chop up and put ¼ cup dried rosemary leaves into a wide mouth mason jar.
- Pour in ¾ cup good quality witch hazel over the herbs in the jar.
- Place the cover on the jar, close tightly and place in a cool dark area (I put it in a small hall closet that doesn’t get much use). Shake the jar as often as you can remember.
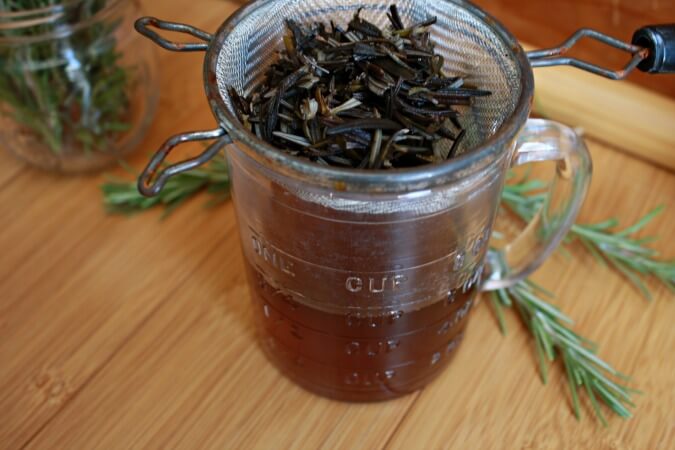
- You’ll want to allow this to infuse for about 2 weeks. Once 2 weeks has gone by, strain the herbs out and the infused liquid will go into a new, clean jar.
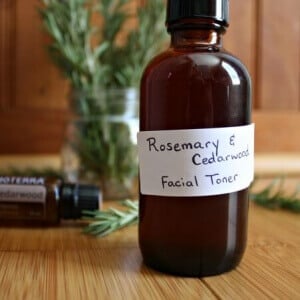
- Add 30 drops of cedarwood essential oil into the infused toner, cover and shake to combine. If you want a stronger cedarwood scent, add up to 10 additional drops.
- Add your label to the new jar and enjoy your new toner or give as a gift!


Can fresh rosemary be used instead of dried?
Hi Jola,
You can use fresh rosemary, you will just need to use more of it. Dried herbs are more concentrated (they contain less water).
~ Amanda
I made something similar to this last spring using just witch hazel, fresh rosemary and thyme sprigs from my garden. I let it ‘marry’ for almost a month in a dark closet. Even my 11 year old enjoyed using this on her face as it leaves a cool, refreshing feeling on hot skin.
That sounds really wonderful!
Could I use rosemary essential oil instead of the plant? I could get fresh rosemary easily enough, but I already have the EO, and it seems like you could use it immediately that way, no?
Hi Heather,
I have never tried to make this with essential oil. I cannot answer as to just how well the essential oil would infuse into the witch hazel. The reason I love the herb so much is that it is given the time and chance to fully infuse all of it’s goodness into the witch hazel, which truly benefits your skin in the long run. If you try it with essential oil, please let us know how it turns out.
~ Amanda
But you’re using Cedarwood EO— and it blends fine with Witch Hazel.
Would it be ok to use fresh rosemary instead of dried?
Hi Cindy,
You can use fresh rosemary, you will just need to use more of it. Dried herbs are more concentrated (they contain less water).
~ Amanda
Would it work same if I use Rosemary Essential oil?
Hi Lena,
I am not sure as I have never tried it myself. Using the herb allows it to infuse all of it’s goodness into the witch hazel. I do not know how well the essential oil would mix and infuse in with the witch hazel. If you try it with essential oil, please let us know how it turns out.
~ Amanda