
Sometimes learning something new can be intimidating.
We can feel a bit out of control the first few times because we don’t know the steps and are not quite sure what the outcome will be. Perhaps you recall the first time you made a cake from scratch or rode a bike. That small nagging feeling in your stomach was the feeling of distress.
The first time I made whey and lactofermented food I had that same nagging feeling…big time. I couldn’t get visions of microbiology experiments gone bad out of my head.
I kept envisioning moldy jars of pickles, rancid sauerkraut, and food poisoning.
However, now that lactofermenting comes second nature to me, I know that my fears were completely unfounded. Here’s what I had to do to get over it, just in case you feel the same way.
First, I had to get my mind out of the path my microbiology teacher so diligently worked toward…all bacteria were not bad to health, in fact, the appropriate ones are great for our health. Increasing immunity, improving digestive issues, and even lowering incidence of autoimmune disease.
Second, I had to get past my aversion to souring dairy products. You see, I had a bad experience with my 5th grade science project with large amounts of rotten milk…actually it was more than rotten, it had been in sealed mason jars for over two weeks with no refrigeration. As you can imagine, when I had to clean these jars the contents were incredibly repulsive.
What ensued was dry heave after dry heave until I could do it no more. Then a lifelong distain for smelling, touching, or being in the presence of rotten, or even soured, dairy ensued. Nope, not even sour cream could come near me, I was hopeless. However, after I learned to make whey and bring myself to actually eat the curds I was shocked to find that this soured dairy was delicious.

Yea, but what does all this have to do with lactofermentation? It’s two fold. Most lactofermentation recipes call for whey, which is made from allowing certain dairy products to sit at room temp for about 24 hours. Second is the actual process of lactofermentation, which is allowing foods to sit in a brine at room temp for anywhere from 2-15 days and essentially develop and grow certain bacteria.
Basically a science experiment right in your kitchen.
When I first read how to make whey I didn’t even think about lactofermenting for another few months. I was disgusted that I would then have to consume the strained yogurt (because I most definitely was not going to just throw it out). However, that nagging voice in my head kept telling me to try it because lactofermented foods are SO amazing for our health. Eventually, I acquiesced and made my first batch of whey, and then pickles. And you know what? They both were awesome, and it was so easy!
So I guess I am here to show you that although lactofermenting may seem like a science experiment gone wrong it’s actually straightforward after the first time you try it. And most definitely worth the time.
In order to lactoferment, many recipes call for whey. Whey is the liquid component in dairy products, the other portion is the curds…you know, like Little Miss Muffet. Unfortunately, you cannot buy whey. It’s not the same things as whey protein powder you get at the store. The only way to get it is to make it from scratch. And the easiest way to do that is strain whole milk yogurt, which comes back to the whole rancid dairy issue I was talking about earlier. I detail below exactly how to make whey so you can get started lactofermenting.
Now, we can most definitely take oral probiotic capsules. However, they can be expensive and offer different types of bacteria than what we get when fermenting in our own homes. Also, you will find that meals are much easier digested if you consume something lactofermented along with it. Perhaps a pickle, sauerkraut, or fermented pesto. For these reasons, in my house we all take a probiotic and eat probiotic rich foods daily.
- 1 qt whole milk, plain, organic yogurt
- 1 thin, clean 100% cotton kitchen towel or cheesecloth
- 1 large glass bowl
- 2 rubberbands
- 1 small glass jar for storing whey
- Thoroughly wash and dry the bowl. It is very important that your bowl is clean
- Place cloth in bowl with edges hanging over
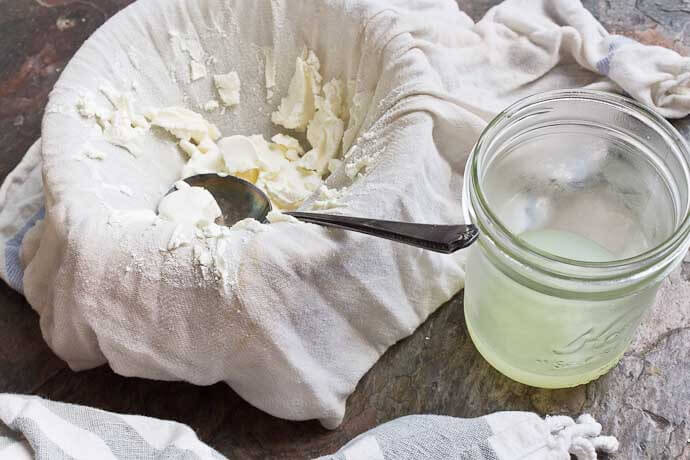
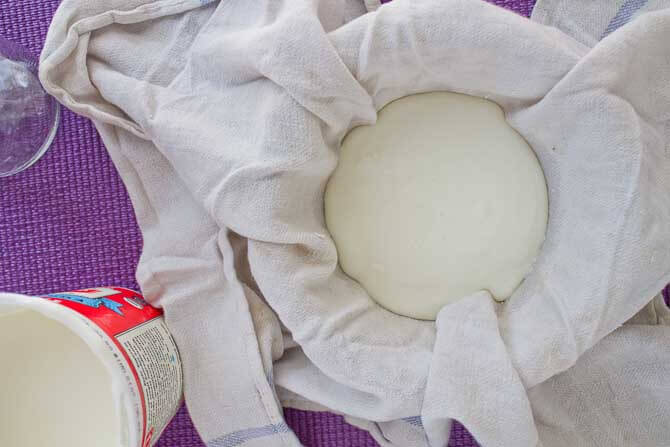
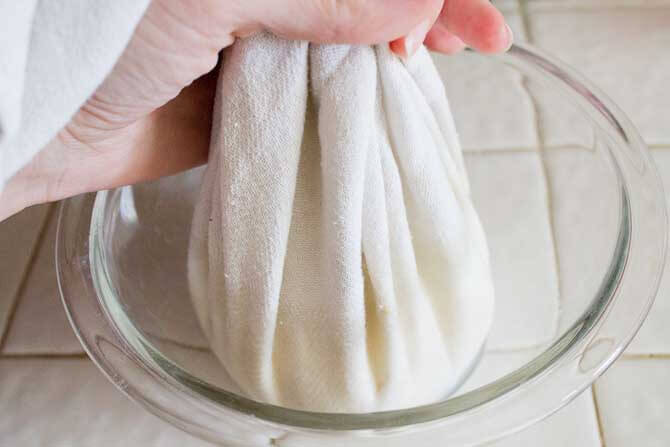
- Pour yogurt on top of cloth and gather all the edges together and up to make a sack of yogurt
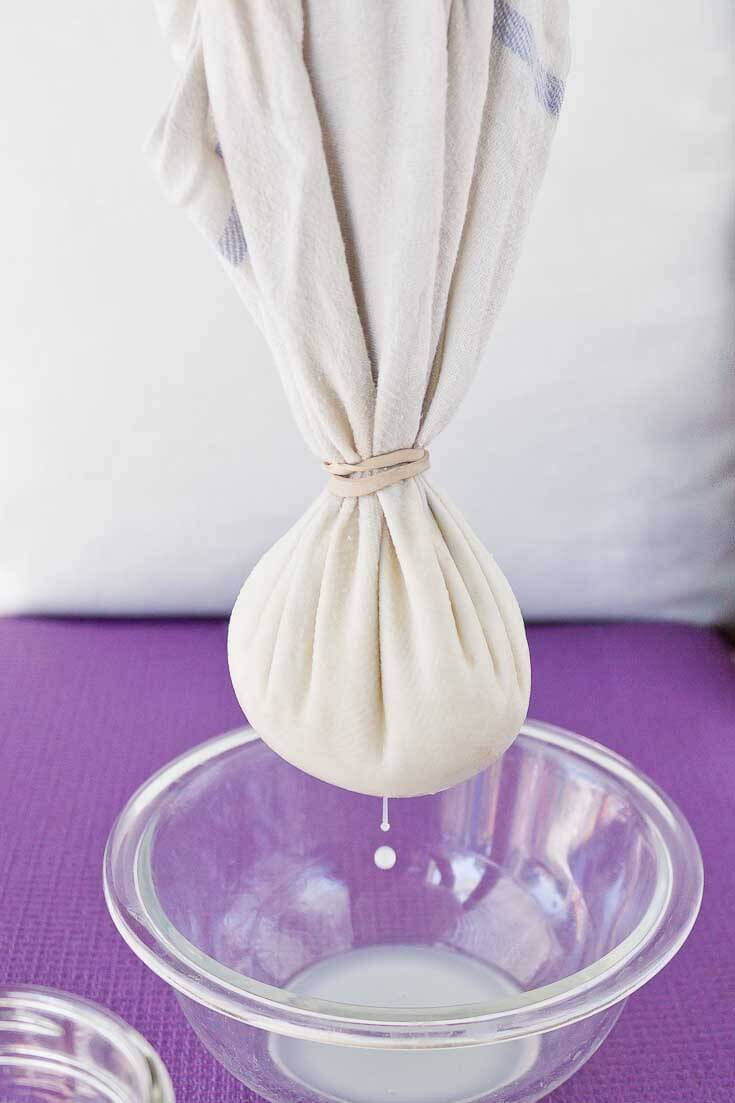
- Tie off with rubber band (you will notice whey starting to drip at this point so do this over the bowl)
- Place the yogurt contraption with another rubber band hanging from a kitchen knob or cabinet and have to bowl underneath to catch the whey
- Let 6-24 hours go by and most of the whey will be strained from the curds. You do not need to refrigerate the yogurt during this process. It will actually build bacterial count in your whey and curds, which is good gut-loving stuff.
- Pour your whey into a mason jar and label for use within 6 months. Keep in refrigerator.
The curds left over are actually greek type yogurt at this point. It is great with a bit of honey or berries. The longer you let the whey strain the thicker your curds will be; eventually it will turn to a cream cheese like consistency.
You now have whey on hand for all your lactofermentation needs. This whey will give the probiotic boost to your recipes and allow for your family to have and maintain health.