

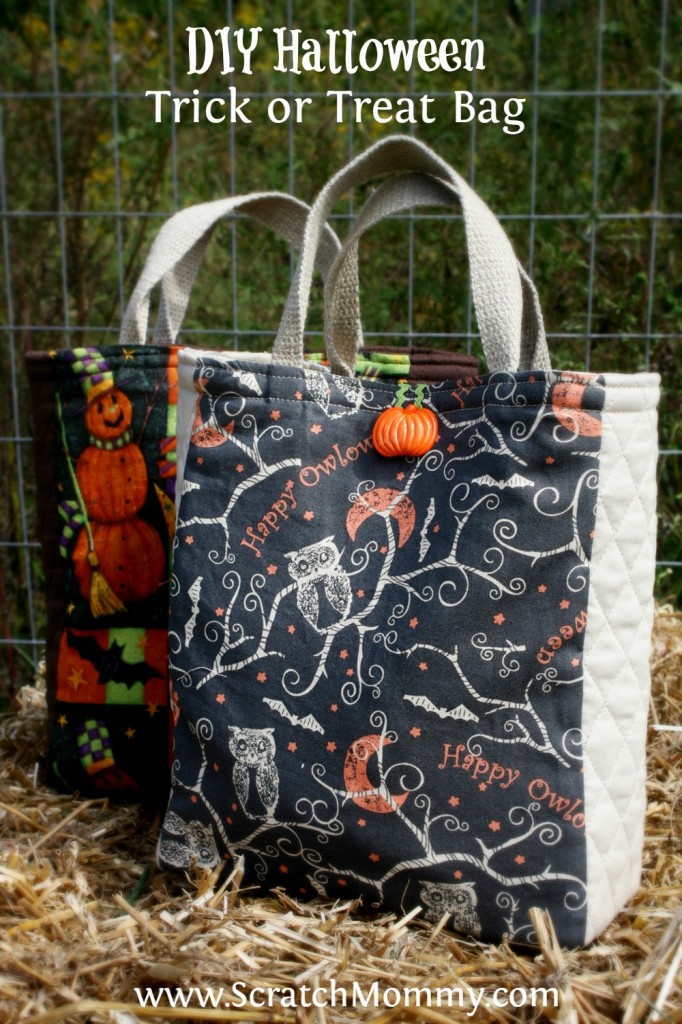
As tough as it is to let go of summer, fall has its wonderful perks too! It’s a time to regroup before the busy holiday season starts and that always puts me into the mood for a DIY project like this DIY Halloween Trick Or Treat Bag.
Crisp air, comfort food recipes, fall gardening, favorite sweaters, outdoor activities, and of course Halloween are a few of the things that make me feel nostalgic this time of year. Now that I’m a mom, these are all things I look forward to with my little ones; particularly Halloween. Every fall while my brother, sister, and I were little, we would think of what we wanted to be for Halloween and my mom would make our costumes. We watched her sew…well, we got into her sewing things and pressed the sewing machine pedal while she was trying to sew. My poor mom. I greatly admire her for her patience!
I’m not as talented as my mom is on the sewing machine, but I love DIY projects with my little girls. These Halloween bags that we made are so much fun, and they’re simple and quick enough to make in one afternoon. Well, maybe a little bit longer than that since my girls were getting into my sewing stuff just like I used to get into my mom’s!
Every year we get our Halloween bags out as soon as fall starts and use them through trick-or-treat time. The great thing is, you can use them for activities besides trick-or-treating so you’re making the most out of your DIY project.
A few of the many ways kids can use them:
- Totes for fall walks (gathering acorns, fall leaves, etc.)
- Book totes
- Apple picking totes
- Farmer’s market bags
- Trick-or-treat bags
The pattern for this bag is so simple that you can adjust the size based on your preferences.
My finished bag size is 8″ x 10″. You could choose fabric that would make it an everyday tote for your little one, or for yourself. I like how they’re versatile and they’re also durable since there are two layers of fabric on all sides. They hold a lot since they’re soft and the sides expand when they’re filled with goodies.
DIY Halloween Trick Or Treat Bag
You’ll need:
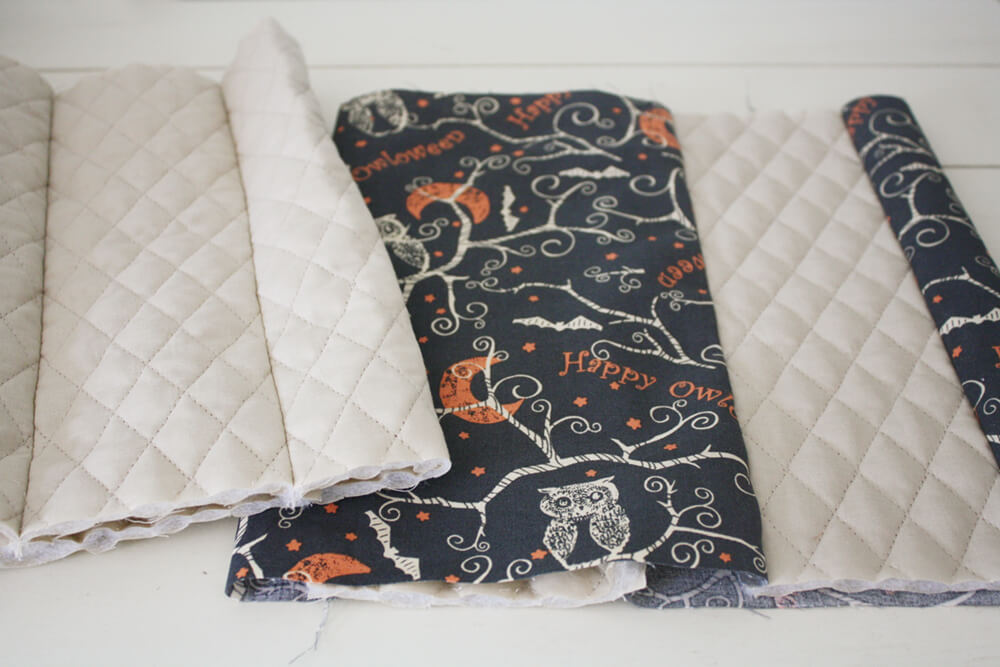
- 2 types of fabric – 1/2 yard each (I chose one Halloween patterned fabric and one quilted, thicker fabric. You’ll have a little leftover which allows room for mistakes.)
- Bag handles (I used hemp webbing but you could use cotton webbing or any other material you prefer.)
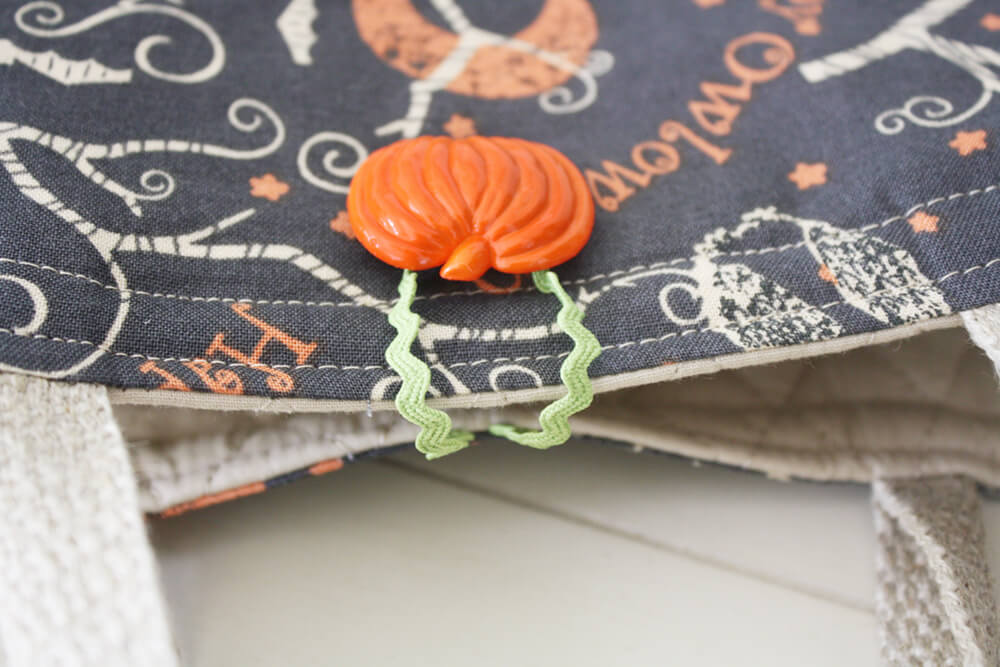
- 1 button
- Fabric ric rac ribbon
- Sewing machine and thread
- Sharp fabric scissors
- Pins
- Newspaper for the pattern
Make it:
1. Make newspaper patterns: One 9″ x 11″ piece, one 4″ x 11″ piece, and one 4″ x 9″ piece.
2. Pin the patterns to the fabric and cut out the pieces: Two 9″ x 11″ patterned fabric pieces (outside front and back panels), two 9″ x 11″ quilted fabric pieces (inside front and back panels), four 4″ x 11″ quilted fabric pieces (outside and inside side panels), and two 4″ x 9″ quilted fabric pieces (inside and outside bottom panels).
3. Cut two 12″-long pieces of webbing for the handles.
4. Cut one 7″-long piece of ric rac for the button loop.
5. To make the outside layer of the bag, pin the two patterned 9″ x 11″ pieces to two of the 4″ x 11″ side panel pieces, right sides together. Sew all four sides together using around a 3/8″ seam allowance.

6. Follow step 5 for the two 9″ x 11″ and remaining two 4″ x 11″ quilted fabric pieces.
7. To attach the bottoms, pin the two 4″ x 9″ quilted fabric pieces to the bottom edges of the panels you just completed, then sew using a 3/8 ” seam allowance.
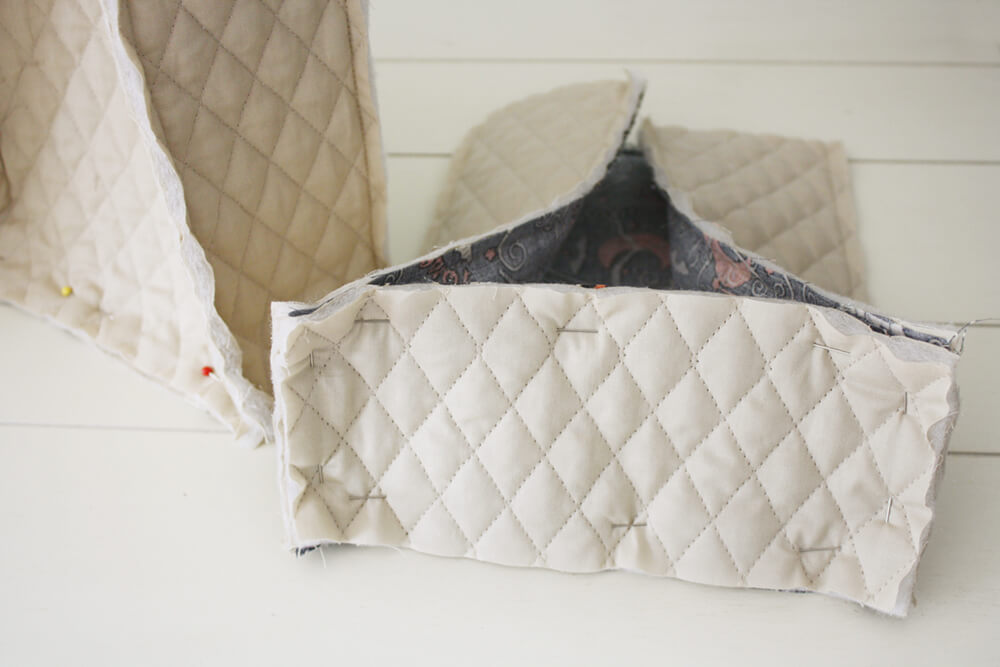
8. When the outside and inside layers of the bag are pieced together, they’ll look like this.

9. Nest the two layers of the bag together, right sides together as shown below. Pin the handles and ric rac button loop on, facing down. Allow 1″ of each handle and ric rac edge to extend out, as shown below.
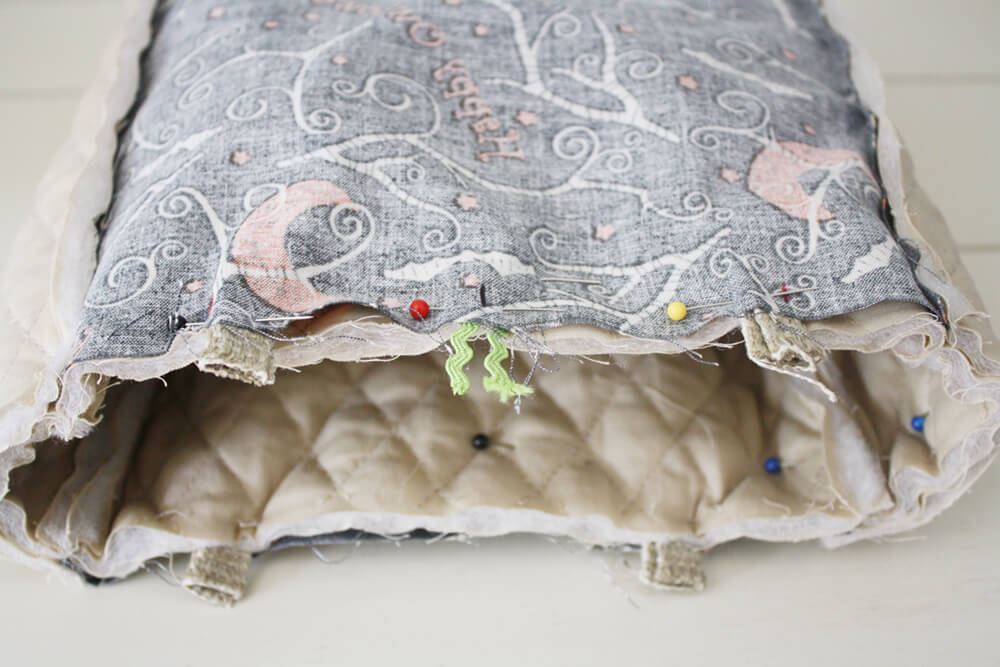
10. Sew the top edge of the layers of fabric together, going over the handles and ric rac, using a 3/8″ seam allowance. STOP TO LEAVE 6″ of space on one of the sides without handles. This is where you’ll reach through and turn the outside layer of the bag right-side-out, and push the inside layer inside of it, also right-side-out.
11. Fold in and pin the seams of the 6″ opening. Top stitch the entire top edge of the bag (I double top stitched it.) Hand sew the button on the front side of the bag, about an inch down from the top.
I hope you’ll enjoy making this fun fall tote, and that you’ll find many uses for it throughout the years!
Comments 1
Thanks, this is great!!! I’ll love pinning this and sharing it with my 13-year-old daughter. I can already see her busy at her sewing machine! Really great photos. :)!!